Acid Reflux Causes, Symptoms & Effective Treatments

Acid Reflux (GERD): Causes, Symptoms & Effective Treatments

Acid Reflux, also known as Gastroesophageal Reflux Disease (GERD), is a common digestive condition where stomach acid flows back into the esophagus, leading to irritation, heartburn, and sometimes serious complications. This guide explains the causes, symptoms, and best treatment options to help you manage GERD effectively.

Best Treatments for Acid Reflux (GERD)

What is Acid Reflux (GERD)?

GERD occurs when the stomach’s acidic contents move backward into the esophagus, causing discomfort and possible damage to the esophageal lining. While it primarily affects adults, children and even infants can experience acid reflux. Occasional reflux is normal, but frequent heartburn may indicate a chronic condition requiring medical attention.


Common Symptoms of Acid Reflux

  • Burning sensation in the chest (heartburn)
  • Chronic cough or sore throat
  • Hoarseness or voice changes
  • Ear pain or sinus irritation
  • Regurgitation of food or sour liquid

If untreated, GERD may lead to esophageal ulcers, strictures, or even esophageal cancer in severe cases.


Causes and Risk Factors

Several factors contribute to GERD, including:

  • Excess stomach acid production
  • Obesity and pregnancy
  • Tight-fitting clothing around the stomach
  • Poor diet and overeating
  • Low stomach acid production (leading to valve malfunction)
  • Yeast infections that mimic reflux symptoms

Best Treatments for Acid Reflux (GERD)

Treatment usually starts with lifestyle modifications and may progress to medications or surgery if necessary.

1. Diet & Lifestyle Changes

  • Avoid trigger foods such as caffeine, soft drinks, fatty meals, and alcohol.
  • Quit smoking to reduce reflux risk.
  • Do not lie down immediately after eating and avoid meals 2 hours before bedtime.

2. Elevating the Head of the Bed

Raising the head of your bed by 6–8 inches (20 cm) can significantly reduce acid backflow at night. Combined with dietary changes, this method provides up to 95% relief for many patients.

3. Medications

Doctors may recommend medications to reduce or neutralize stomach acid, such as:

  • Antacids – neutralize acid and provide quick relief.
  • H2 blockers (e.g., famotidine) – reduce acid production.
  • Proton pump inhibitors (PPIs) (e.g., omeprazole) – block acid secretion more effectively.

4. Surgical Options

For severe or persistent GERD, surgery such as Nissen fundoplication may be recommended. This procedure strengthens the esophageal sphincter and helps restore normal digestive function.


Frequently Asked Questions (FAQ)

Is acid reflux the same as heartburn?

Not exactly. Heartburn is a symptom of acid reflux, described as a burning feeling in the chest or throat.

When should I see a doctor for GERD?

If you experience heartburn more than twice a week, or if symptoms interfere with your daily life, consult a doctor for proper diagnosis and treatment.

Can lifestyle changes alone cure GERD?

For many people, avoiding trigger foods, eating smaller meals, and elevating the head during sleep can greatly reduce symptoms. However, some cases may still require medication or surgery.

Disclaimer: This content is for informational purposes only and should not replace professional medical advice. Always consult your healthcare provider for personalized treatment.

Share:

4 Best ThundeaL Projectors for a Home Theater Experience That Beats Any TV In 20254

ThundeaL TD85SE Home Projector

ThundeaL TD85SE Home Projector

The ThundeaL TD85SE offers Full HD 1080p resolution with 4K decoding support, turning your wall into a high-quality cinema display. With 14,000 lumens brightness, it delivers rich colors and clarity even in daylight. Thanks to autofocus and 70-degree keystone correction, the picture aligns automatically. Running on Android 12, it lets you download apps directly from Google Play, stream content, and even open documents like Word, Excel, or PDF files from a flash drive. Wireless connectivity options include Bluetooth, AirPlay, Miracast, and DLNA. Built-in speakers handle everyday use, while external speakers can be added for a full home-theater experience. It even supports 3D movies for a more immersive viewing experience.


ThundeaL TD98W Home Projector

ThundeaL TD98W Home Projector

The TD98W supports Full HD 1080p and 4K resolution for crisp, detailed visuals. Autofocus and keystone correction keep the image distortion-free, even at an angle. Powered by Android 9.0, it allows direct app downloads from Google Play. Connectivity includes Bluetooth, AirPlay, Miracast, HDMI, USB, Ethernet, and 3.5mm/3RCA ports, making it extremely versatile. With 21,000 lumens brightness, you can enjoy content during the day or night. The 15W built-in speaker provides strong sound, and you can expand with external audio devices. This model also supports 3D video, scaling from 50–100%, and 360° image rotation.


ThundeaL TD92 Pro Projector

ThundeaL TD92 Pro Projector

The TD92 Pro runs on Android 9.0 with a CA53x4 processor and Mali-450 graphics, ensuring stable app performance and smooth playback. It supports Full HD 1080p with up to 4K UHD input, making visuals sharp and vibrant. Its 15,000 lumens brightness allows clear viewing even in daylight. Equipped with autofocus and 6D Keystone correction, it keeps the image aligned effortlessly. Offering projection sizes from 30 to 300 inches, it adapts to both small and large spaces. With Wi-Fi (2.4G/5G/6G), Bluetooth 5.0, AirPlay, and Miracast, wireless streaming is seamless. Multiple ports (USB, HDMI, AV, Audio) make it compatible with laptops, consoles, and speakers.


Projector ThundeaL TD80W

Projector ThundeaL TD80W

Compact yet powerful, the TD80W runs on Android 13, letting you install apps directly from Google Play. Dual-band Wi-Fi ensures fast, lag-free streaming, while AirPlay, Miracast, and DLNA make it easy to connect from smartphones and laptops. With Full HD resolution and 4K decoding, the visuals are sharp and vibrant. 11,000 lumens brightness paired with a 10,000:1 contrast ratio makes daytime viewing possible without blackout curtains. Automatic keystone correction and scaling up to 100% make setup simple and hassle-free.


Portable Outdoor Projector with Tripod, Kids Gift

Portable Outdoor Projector with Tripod, Kids Gift

The VISSPL 2025 mini projector is a compact yet powerful gadget that brings full HD 1080P visuals and eye-friendly LED technology into a device small enough to fit in your pocket. Despite its tiny size, it delivers vibrant colors, clear images, and a cinematic atmosphere with screen sizes up to 160’’. The built-in HiFi speaker and included tripod make setup simple and enjoyable, while multiple connection options let you pair it with phones, laptops, gaming consoles, and more. Lightweight and easy for kids to handle, this projector makes an excellent gift idea for a child’s room—perfect for turning bedtime into movie night, hosting fun sleepovers, or creating a magical little home theater corner.

Share:

Everyday Essentials You Didn’t Know You Needed

Cute Small Things You Didn’t Know You Needed (But Absolutely Do!)


Sometimes we don’t even realize how much easier (and brighter) life can be with a few simple everyday essentials. From stylish organizers to cozy home finds, we’ve rounded up some practical, affordable, and surprisingly fun products you can grab right on Amazon.


Artistic Cardholder Wallet

This compact cardholder comes with eleven compartments to store everything: credit cards, IDs, membership passes, and more. Designed like a small wallet with a secure lock, it keeps your items safe and organized. What makes it stand out is the art-inspired design that adds a touch of creativity to your everyday essentials.


Silicone Charging Cable

Check Details On Amazon

Made of soft silicone, this fast-charging cable isn’t just durable but also pleasant to the touch. Its bright color makes it easy to find in your bag, and it supports both device charging and data syncing. Compatible with smartphones, tablets, and laptops, it delivers reliable, quick charging when you need it most, It is suitable for smartphones of different models (from Samsung Galaxy to iPhone 15), laptops and tablets..


Personal Safety Keychain

A must-have for personal safety, especially for women who often return home late night. Small enough to slip into your pocket, this keychain features a built-in flashlight and a loud alarm for emergencies. Just pull the plug to activate it and reinsert to stop. Lightweight, portable, and effective.


Fun Cartoon Soap Dish

Brighten your bathroom with a soap dish that greets you with a smile. Available in multiple colors, it includes drainage holes to keep soap dry and lasting longer. Functional yet playful, it’s a small detail that makes daily routines more cheerful.


Digital Kitchen Scale

If you have long wanted to start monitoring your diet to take care of your health, then this is your sign. And the portable digital scales will help you. It has fairly easy controls - just two buttons, one of which is responsible for turning on and off. They can withstand a weight of up to 5 kg, are charged from two AAA batteries and do not take up much space. But they allow you to put together a healthy plate and not worry that you did not get enough useful elements.


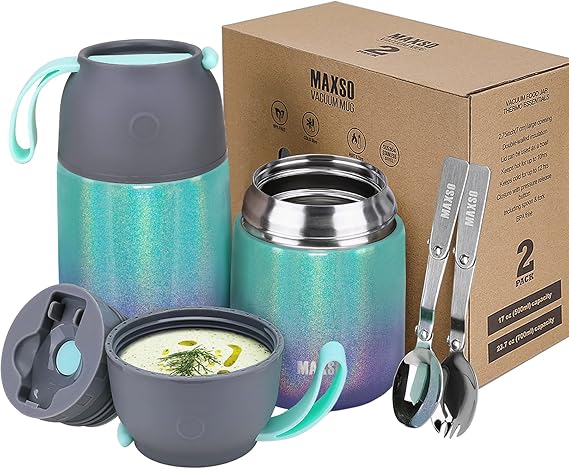
Stainless Steel Thermo Mug

Why spend money on takeaway drinks when you can carry your favorite coffee, tea, or hot chocolate in a vacuum-insulated travel mug? It keeps drinks hot or cold for hours, fits easily in your bag, and comes with a leak-proof lid for convenience on the go.


Cozy Plush Slippers

Perfect for chilly days, these plush slippers with faux fur lining keep your feet warm and cozy. Available in multiple colors, they feature a cute bear applique that makes lounging at home extra adorable.


Gentle Hair Comb

Whether your hair is straight, wavy, or curly, this wide-tooth comb detangles smoothly without breakage. Suitable for dry or damp hair, it glides easily and helps maintain healthy, manageable locks.


High-Capacity Power Bank

Stay powered up anywhere with a 20,000mAh power bank. Capable of 2–4 full phone charges, it supports fast charging and even includes a display to show remaining battery life. A must-have for travel, work, or emergencies.


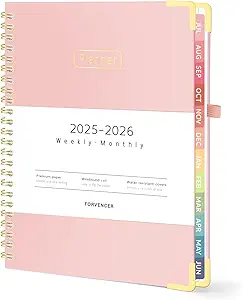
Cute Daily Planner

Stay organized with a planner that combines calendars, weekly layouts, and lined pages for notes. Its whimsical illustrations bring joy to scheduling, turning boring to-dos into something you’ll actually look forward to writing down.


From personal safety to stylish organization, these Amazon finds are simple, practical, and surprisingly fun to own. Add them to your daily routine and notice how small changes can make a big difference!


Share:

Does Coffee Raise Blood Pressure? The Truth You Need to Know

Does Coffee Really Raise Blood Pressure? The Evidence You Can’t Afford to Ignore


Coffee and blood-pressure

Unveiling the Truth About Coffee and Blood Pressure

For countless of us, that first sip of coffee in the morning is a sacred ritual—a moment of warmth, comfort, and awakening. Yet, beneath its familiar embrace lies a stirring question: Does coffee raise blood pressure? This concern tugs at those who cherish their daily brew but also monitor their cardiovascular health. Today, we'll delve into the medical and scientific findings with clarity and empathy, so you can enjoy your coffee with confidence.


Understanding Caffeine: What’s Really Happening in Your Body

At the heart of the debate lies caffeine—the primary active compound in coffee. Caffeine is a stimulant that triggers the release of adrenaline, meaning your heart rate and blood pressure can rise temporarily. This effect, while usually short-lived, prompts many to wonder whether their beloved coffee poses a hidden risk.


Short-Term vs. Long-Term Effects on Blood Pressure

Short-Term Impact

Within minutes of consuming coffee, caffeine markedly influences your cardiovascular system. Blood pressure often increases by approximately 5–10 mm Hg for 30 to 120 minutes following consumption. This acute spike is well-documented and may affect individuals who are sensitive to caffeine more significantly.

Long-Term Effects

Here’s where the conversation becomes less distressing. People who drink coffee regularly tend to develop a tolerance. Over time, studies suggest that this tolerance limits caffeine's ability to raise blood pressure—even among those with hypertension. In healthy habitual coffee drinkers, any lasting effect on blood pressure appears minimal, typically under 2 mm Hg—well within the margin of normal daily fluctuations.


Who Should Be Cautious?

Understanding your personal health landscape is crucial.

  • Individuals with hypertension: Caffeine may momentarily elevate blood pressure. If your readings are already high, monitor how your body responds.

  • Caffeine-sensitive individuals: For some, even small doses can cause pronounced effects—think jitteriness, rapid heartbeat, and noticeable blood pressure changes.

  • Older adults and those with pre-existing conditions: These groups may experience more pronounced reactions, though research on these populations is still evolving.


The Silver Lining: Coffee’s Potential Health Benefits

Before you lock away your coffee mug, it’s important to acknowledge the growing body of research illuminating coffee’s benefits:

  • Antioxidant powerhouse: Coffee is rich in compounds like chlorogenic acids that combat inflammation and oxidative stress.

  • Metabolic and neurological resilience: Regular coffee consumption has been linked to reduced risk of type 2 diabetes and certain neurodegenerative conditions.

  • Cardiovascular protection: In moderation, coffee may contribute to heart health—partly through improved endothelial function and insulin sensitivity.


Daily Dosage: How Much Coffee Is Too Much—or Just Right?

An informed approach helps balance safety with enjoyment:

  • Moderation is key: Four cups a day (about 400 mg of caffeine) is generally considered safe for most healthy adults.

  • Mind your form: Espresso shots, cold brews, and certain blends pack more caffeine per ounce and can have stronger effects.

  • Time your intake: Consuming coffee late in the day can disrupt sleep, which indirectly impacts blood pressure regulation.


Best Practices: Enjoy Coffee Without the Worry

  1. Start small: If you’re sensitive or managing hypertension, begin with a half cup or switch to decaf.

  2. Track your response: Keep an eye on your readings before and after your brew. A home blood pressure monitor can offer invaluable insight.

  3. Consider timing: Avoid coffee on an empty stomach, as acidity combined with caffeine may compound its effect on your system.

  4. Mind your add-ins: Heavy creams, sugars, or syrups add calories and can contribute to weight gain—an indirect driver of high blood pressure.

  5. Listen to your body: Palpitations, anxiety, or headaches after your cup? It’s worth cutting back or consulting your healthcare provider.


Final Thoughts: Sip Smart, Live Well

Coffee—often derided as a simple stimulant—is far more nuanced. For many, it's a source of joy, comfort, and even healthful antioxidants. While it can raise blood pressure in the short term, especially in caffeine-sensitive individuals or those with high blood pressure, the long-term effects in regular drinkers are modest.

Here’s what matters most: Know your body, observe how it reacts, and enjoy your coffee consciously. When consumed within reasonable limits, coffee can remain a cherished part of your daily life—without compromising your health.


Share:

Biotin for Hair Growth: Does It Work and Is It Safe?

Biotin for Hair Growth: Does It Work and Is It Safe?


Understanding Biotin and Its Role in Hair Health

Biotin for Hair Growth

What is Biotin?

Biotin, also known as Vitamin B7, is a water-soluble B-vitamin that helps your body convert food into energy. It plays a major role in maintaining healthy skin, nails, and most notably—your hair.


Why Biotin Became a Hair Growth Trend

The link between biotin and hair growth stems from its role in cellular growth and regeneration. Toss in social media testimonials and influencer hype, and biotin became the go-to for anyone chasing thicker, fuller locks.


Biotin for Hair Growth: Is There Any Real Proof?

Clinical Evidence on Biotin's Effectiveness

Research confirms that biotin can help improve hair growth in individuals who are biotin-deficient. However, if your body already has sufficient levels, extra supplementation may not make a noticeable difference.


User Experiences: Mixed Results

Some users report stronger, shinier hair, while others see no change. Results depend heavily on individual deficiencies, genetics, and lifestyle habits.


Who Needs Biotin the Most?

Signs of Biotin Deficiency

  • Hair thinning or hair loss
  • Brittle nails
  • Skin rashes or irritation
  • Fatigue and mood changes

High-Risk Groups for Deficiency

  • Pregnant women
  • People with digestive disorders (e.g., IBS, Crohn’s)
  • Those on long-term antibiotics
  • Individuals consuming raw egg whites regularly

Is Biotin Safe for Daily Use?

Recommended Dosage Guidelines

The average adult needs around 30 mcg of biotin per day. However, many supplements offer doses up to 10,000 mcg. Fortunately, excess biotin is typically excreted via urine, though moderation is always key.


Potential Side Effects

Mild Issues: Jawline acne and stomach upset in some users.
More Serious Concerns: High doses can interfere with lab results, so inform your healthcare provider before bloodwork.


How to Take Biotin for Hair Growth

Forms of Biotin

Oral forms—capsules, tablets, and gummies—are the most effective. Biotin shampoos and topical treatments don’t offer much because skin absorption is minimal.


Best Practices for Real Results

  • Take biotin daily with food
  • Stay consistent
  • Drink plenty of water
  • Give it 3–6 months to see noticeable improvements

Natural Biotin Alternatives for Hair Growth

Biotin-Rich Foods to Add to Your Diet

  • Cooked eggs
  • Almonds
  • Sweet potatoes
  • Spinach
  • Salmon

Other Nutrients That Support Hair Growth

  • Zinc
  • Vitamin D
  • Iron
  • Vitamin E
  • Collagen

Biotin Myths Busted

More Biotin Doesn’t Mean More Hair

Your body only uses what it needs. Mega-doses won’t fast-track your results, and can lead to side effects or lab test interference.


Biotin Isn’t a One-Man Army

Hair health is complex. Hormones, stress, diet, and sleep all play a role. Biotin is just one piece of the puzzle.


Conclusion: Should You Try Biotin?

If you're deficient, biotin supplements can be a total game-changer. If you’re not, the effect may be mild or nonexistent. It’s affordable, generally safe, and worth a shot—but don't expect overnight miracles. Combine it with a balanced diet, exercise, and low-stress living for best results.


Recommended Amazon Products for Hair Growth Support


User Interaction:

Have you tried biotin for your hair journey? Did it work for you? Drop your experience in the comments below and let’s start a real conversation. Got questions? Ask away—we’re here to grow together. Share this article if it helped you or could help someone else.


FAQs About Biotin and Hair Growth

1. How long does it take for biotin to work on hair?

It usually takes 3–6 months of consistent use to see noticeable results.


2. Can I take biotin every day?

Yes, daily intake within recommended limits is safe for most people.


3. Will biotin cause acne?

High doses may cause acne in some individuals, particularly around the jawline.


4. Is biotin safe during pregnancy?

Biotin is generally safe, but consult your healthcare provider before use during pregnancy.


5. Can I get enough biotin from food?

Yes, a well-rounded diet with biotin-rich foods can meet your daily needs.

Share:

Banana Pudding with Vanilla Wafers: A Classic Southern Delight

Banana Pudding with Vanilla Wafers: A Classic Southern Delight

Introduction

Banana pudding with vanilla wafers is a beloved Southern dessert that has won hearts across America. Its roots trace back to the late 19th century when bananas became more accessible in the U.S. This layered dessert is especially popular in spring and summer, offering a cool and creamy treat perfect for family gatherings, potlucks, and holidays. With rich vanilla flavor, ripe bananas, and the nostalgic crunch of vanilla wafers, this dessert hits all the right notes.

Banana Pudding with Vanilla Wafers

Ingredients

Main Ingredients

  • 3 cups whole milk
  • 3/4 cup granulated sugar
  • 1/4 cup all-purpose flour
  • 1/4 teaspoon salt
  • 4 large egg yolks, lightly beaten
  • 2 teaspoons vanilla extract
  • 1 box (11 oz) vanilla wafers
  • 4 to 5 ripe bananas, sliced
  • Whipped cream or meringue (optional for topping)

Substitution Notes

You can substitute whole milk with almond or oat milk for a dairy-free version. Gluten-free vanilla wafers work well for gluten-sensitive individuals.

Instructions

  1. In a medium saucepan, combine sugar, flour, and salt. Gradually whisk in milk over medium heat.
  2. Cook, stirring constantly, until the mixture thickens and begins to bubble (about 8–10 minutes).
  3. Temper the egg yolks by adding a small amount of the hot mixture into the yolks, then return the mixture to the saucepan.
  4. Cook for another 2 minutes, stirring constantly. Remove from heat and stir in vanilla extract.
  5. In a 2-quart dish, layer vanilla wafers, banana slices, and pudding. Repeat layers until ingredients are used up, ending with pudding on top.
  6. Top with whipped cream or meringue, if desired.
  7. Chill in the refrigerator for at least 4 hours before serving for best flavor and texture.

Cooking Tips and Tricks

  • Use ripe but firm bananas to prevent mushiness.
  • For added flavor, fold in a bit of mashed banana into the pudding.
  • To prevent browning, toss banana slices lightly in lemon juice before layering.
  • Prepare a day ahead—this dessert tastes even better after the flavors meld overnight.

Dietary Considerations

This recipe can be adapted for vegetarian and gluten-free diets with the right substitutions. For a lower-sugar version, opt for sugar substitutes and low-sugar wafers.

Nutritional Information (Approx. per serving)

  • Calories: 290
  • Carbohydrates: 45g
  • Protein: 5g
  • Fat: 10g
  • Saturated Fat: 4g
  • Sugar: 30g

Serving Suggestions

Serve chilled in individual parfait cups for a cute presentation. Garnish with crushed wafers, banana slices, or a sprig of mint. Pair with iced tea or coffee for a delightful finish.

Have you tried this banana pudding recipe? Leave a comment below and let us know how it turned out! Share your tips, tweaks, or even photos—we love hearing from you!

Tags

banana pudding, vanilla wafers, southern dessert, homemade banana pudding, easy pudding recipe, classic desserts, potluck desserts, summer desserts

Share:

Baked Juicy Lemon Chicken Breasts with a Zesty Lemon Flavor Recipe

Baked Juicy Lemon Chicken Breasts with a Zesty Lemon Flavor Recipe

A Bright and Flavorful Chicken Dish for All Seasons

Originating from the sunny Mediterranean region, lemon chicken has long been a staple for those who enjoy bold, citrus-forward dishes. This baked version is especially popular during spring and summer, but its comforting aroma makes it just as welcome in cooler months. It’s juicy, tangy, and effortlessly elegant—perfect for family dinners or meal prepping for the week.


Ingredients You'll Need

  • 4 boneless, skinless chicken breasts
  • 2 tablespoons olive oil
  • 3 cloves garlic, minced
  • 1 tablespoon fresh parsley, chopped
  • 1 teaspoon dried oregano
  • 1/2 teaspoon salt
  • 1/2 teaspoon black pepper
  • Juice of 2 lemons (about 1/4 cup)
  • Zest of 1 lemon
  • 1/4 cup low-sodium chicken broth

Optional Substitutions: Use lime juice for a tropical twist, or swap chicken breasts for thighs for added richness.

Step-by-Step Instructions

  1. Preheat your oven to 400°F (200°C).
  2. In a small bowl, mix olive oil, garlic, parsley, oregano, salt, pepper, lemon juice, and zest.
  3. Place chicken breasts in a baking dish and pour the marinade over them. Let sit for 15–30 minutes for best flavor.
  4. Pour chicken broth into the dish to keep the meat moist during baking.
  5. Bake uncovered for 25–30 minutes or until the internal temperature reaches 165°F (74°C).
  6. Remove from oven, let rest for 5 minutes, and spoon pan juices over the top before serving.

Cooking Tips and Tricks

  • Use a meat thermometer to avoid overcooking.
  • For extra juiciness, pound the chicken breasts to an even thickness before marinating.
  • Add lemon slices to the baking dish for an aromatic touch.

Dietary Considerations

This recipe is naturally gluten-free, low in carbohydrates, and suitable for paleo and keto diets. To make it dairy-free, simply avoid adding cheese-based garnishes.

Nutritional Information (Per Serving)

  • Calories: 280
  • Protein: 30g
  • Fat: 15g
  • Carbohydrates: 4g
  • Sugar: 1g
  • Sodium: 420mg

Serving Suggestions

Serve with garlic roasted potatoes, steamed green beans, or a fresh arugula salad. Pair with a chilled glass of white wine or sparkling lemon water for a refreshing meal.

We'd Love to Hear From You!

Did you try this recipe? Let us know how it turned out in the comments below. Share your tweaks, tips of your delicious lemon chicken—we're all about sharing and learning together!


Share:

BBQ Chicken - A Crowd Favorite, Perfect for Any Gathering

BBQ Chicken - A Crowd Favorite, Perfect for Any Gathering

Introduction

BBQ Chicken has long been a staple at American cookouts, summer picnics, and family gatherings. Believed to have Southern roots, this dish is celebrated for its smoky-sweet flavor, crispy skin, and juicy interior. Whether you're hosting a backyard bash or a casual weeknight dinner, BBQ Chicken brings people together with its irresistible aroma and comforting taste.

BBQ Chicken Recipe
BBQ Chicken - A Crowd Favorite, Perfect for Any Gathering

Ingredients

For the Chicken:

  • 4 bone-in, skin-on chicken thighs
  • 1 tbsp olive oil
  • 1 tsp garlic powder
  • 1 tsp smoked paprika
  • Salt and pepper to taste

For the BBQ Sauce:

  • 1 cup ketchup
  • 1/4 cup brown sugar
  • 2 tbsp apple cider vinegar
  • 1 tbsp Worcestershire sauce
  • 1 tsp mustard powder
  • 1/2 tsp chili powder (optional)

Substitution Tip: You can use store-bought BBQ sauce if short on time. For a spicier kick, add cayenne or hot sauce.

Instructions

  1. Preheat grill or oven to 375°F (190°C).
  2. Pat the chicken dry and coat with olive oil, garlic powder, paprika, salt, and pepper.
  3. In a saucepan over medium heat, mix all BBQ sauce ingredients. Simmer for 10 minutes, stirring occasionally.
  4. Place chicken on the grill or baking sheet. Cook for 20 minutes, turning once.
  5. Brush chicken with BBQ sauce and cook for another 10–15 minutes, or until the internal temperature reaches 165°F (74°C).
  6. Let rest for 5 minutes before serving.

Cooking Tips and Tricks

  • Use a meat thermometer to ensure perfect doneness.
  • Baste the chicken during the last 10 minutes to prevent burning the sauce.
  • Marinate the chicken overnight for deeper flavor.

Dietary Considerations

This recipe is naturally gluten-free if the BBQ sauce ingredients are gluten-free. It's also high in protein and can be adapted for keto diets by reducing or eliminating the sugar in the sauce.

Nutritional Information (Per Serving)

  • Calories: 320
  • Protein: 25g
  • Fat: 18g
  • Carbohydrates: 15g
  • Sugar: 10g

Serving Suggestions

Pair this BBQ Chicken with grilled corn, coleslaw, or baked beans. Add a cold glass of lemonade or iced tea for a refreshing summer meal.

Join the Conversation!

Have you tried this BBQ Chicken recipe? Leave a comment below to share your tips, tweaks, or photos. We love hearing from our fellow food lovers!

Share:

Baked Caesar Chicken Recipe

Baked Caesar Chicken Recipe


Baked Caesar Chicken is a rich and creamy dish inspired by the classic Caesar salad. Originating from the flavors of Caesar dressing—garlicky, tangy, and savory—this chicken bake is a beloved weeknight staple that feels fancy enough for entertaining. It’s best enjoyed during cooler months when comforting oven meals hit the spot, but really, it's a crowd-pleaser all year round!


Recipe Introduction

This Baked Caesar Chicken is a creamy, savory, and ultra-satisfying dish. With just a few simple ingredients, you get a juicy, flavorful chicken that pairs beautifully with veggies or pasta. It’s perfect for busy weeknights, casual dinners, or even meal prep!


Ingredients

  • 4 boneless, skinless chicken breasts
  • 1 cup Caesar salad dressing (preferably creamy)
  • 1/2 cup grated Parmesan cheese
  • 1 tsp garlic powder
  • Salt and pepper to taste
  • Chopped parsley for garnish (optional)

Substitution Tips: Swap Parmesan with Pecorino Romano for a sharper flavor. Use low-fat Caesar dressing for a lighter version.


Instructions

  1. Preheat your oven to 375°F (190°C).
  2. Place the chicken breasts in a greased baking dish.
  3. In a bowl, mix the Caesar dressing, Parmesan cheese, and garlic powder.
  4. Pour the mixture evenly over the chicken breasts.
  5. Sprinkle with salt and pepper to taste.
  6. Bake uncovered for 25–30 minutes, or until the chicken is cooked through (internal temperature of 165°F/74°C).
  7. Optional: Broil for 2–3 minutes at the end for a golden top.
  8. Garnish with chopped parsley before serving.


Cooking Tips & Tricks

  • Use a meat thermometer for perfect doneness without drying out the chicken.
  • Marinate the chicken in Caesar dressing for 1–2 hours beforehand for extra flavor.
  • Line the baking dish with foil for easier cleanup.


Dietary Considerations

This recipe is low-carb and gluten-free (just ensure your Caesar dressing is gluten-free). You can make it keto-friendly by choosing a high-fat, low-sugar dressing.


Nutritional Information (Per Serving)

  • Calories: 320
  • Protein: 35g
  • Fat: 18g
  • Carbohydrates: 3g
  • Sugar: 1g
  • Sodium: 520mg

*Note: Nutrition may vary based on dressing and cheese used.


Serving Suggestions

Pair your Baked Caesar Chicken with:

  • Roasted broccoli or green beans
  • Garlic mashed potatoes or cauliflower mash
  • Steamed rice or a crisp Caesar side salad


Join the Conversation

Have you tried this Baked Caesar Chicken recipe? Let us know how it turned out in the comments below! 

Tags:

#BakedCaesarChicken #EasyChickenRecipes #HealthyDinnerIdeas #LowCarbMeals #FamilyDinner

Share:

Asparagus Recipes: Fresh, Flavorful, and Easy to Make

Asparagus Recipes: Fresh, Flavorful, and Easy to Make

My Spring Obsession with Asparagus

Every spring, as soon as the local farmers' market starts buzzing, I find myself magnetically drawn to one particular vegetable — asparagus. There’s something magical about those crisp green stalks. I remember the first time I roasted asparagus with lemon and garlic — it was simple, fast, and tasted like sunshine on a plate. Ever since then, asparagus has become a staple in my kitchen from March through June.


Why You'll Love These Asparagus Recipes

Whether you're looking for a light side dish or a hearty vegan entrée, asparagus offers a mild, slightly nutty flavor that pairs well with a variety of ingredients. These recipes are perfect for weeknight dinners, holiday spreads, or healthy meal prep options.

Ingredients You’ll Need

  • 1 bunch fresh asparagus, trimmed
  • 2 tablespoons olive oil
  • 2 cloves garlic, minced
  • Juice of 1 lemon
  • Salt and pepper to taste
  • Optional: grated Parmesan cheese, red pepper flakes, balsamic glaze

Substitution Tips: Use avocado oil instead of olive oil for a different flavor. For a vegan option, skip the Parmesan or use a plant-based alternative.

Step-by-Step Instructions

  1. Preheat your oven to 400°F (200°C).
  2. Wash and trim the asparagus ends (about 1 inch).
  3. Place asparagus on a baking sheet, drizzle with olive oil, and toss with garlic, salt, and pepper.
  4. Roast for 12–15 minutes until tender and slightly crispy.
  5. Remove from oven and squeeze fresh lemon juice on top.
  6. Optional: sprinkle with Parmesan or drizzle with balsamic glaze before serving.

Cooking Tips & Tricks

  • Thin asparagus cooks faster — check around 10 minutes to avoid overcooking.
  • For extra crispiness, broil the last 2 minutes.
  • To prep ahead, trim and marinate asparagus up to a day in advance.

Dietary Considerations

This recipe is naturally gluten-free, low-carb, and can be easily made vegan. It's suitable for keto, paleo, and vegetarian diets.

Nutritional Information (Per Serving)

  • Calories: 90
  • Fat: 7g
  • Carbohydrates: 5g
  • Fiber: 2g
  • Protein: 2g

Serving Suggestions

Pair this roasted asparagus with grilled salmon or tofu, quinoa salad, or creamy mashed potatoes. It’s also fantastic served cold in salads or added to pasta.

Join the Conversation

Have you tried this recipe? Let me know how it turned out in the comments below! Got a twist of your own? 

Share:

4 Easy Tips for Making Delicious Iced Coffee Drinks at Home

Easy Homemade Iced Coffee Recipes: 4 Refreshing Tips You’ll Love

A big chill is sweeping the coffee world as iced coffee continues to rise in popularity. Here are four simple yet effective tips to help you craft delicious, iced coffee drinks at home—no barista skills required.

Why Iced Coffee is Gaining Ground

According to the National Coffee Association, the number of Americans drinking iced coffee has grown steadily—from 20% in 2003 to 29% in 2004—and it hasn’t stopped climbing since. While cappuccinos and lattes have had their day, iced coffee is now the go-to choice for those looking for a refreshing and tasty pick-me-up.


Benefits of Making Iced Coffee at Home

Homemade iced coffee is not only cost-effective but also customizable. With just a few ingredients and a little creativity, you can recreate your favorite café-style beverages in your own kitchen. Whether it's a chilled vanilla mocha or a bold iced latte, you’re in control of the flavor, strength, and sweetness.

How to Make the Perfect Iced Coffee: 4 Easy Tips

1. Add Flavoring First

For the best flavor blend, start by pouring your preferred flavoring syrup (like vanilla, caramel, or hazelnut) into your glass. Then add freshly brewed coffee or espresso, followed by ice and a splash of cold milk.

2. Avoid Watery Coffee

No one likes diluted coffee. Instead of regular ice cubes, use ones made from frozen coffee. This keeps your drink strong and rich even as the ice melts.

3. Use High-Quality Coffee Equipment

A quality brew starts with quality tools. Consider using a coffee maker like the Espresso Coffee Maker, which grinds beans right before brewing for maximum freshness and flavor control.

4. Customize With Toppings

Take your iced coffee to the next level by adding whipped cream, chocolate shavings, cinnamon, or nutmeg. These extras can elevate your drink from basic to indulgent in seconds.

Final Thoughts

Making iced coffee drinks at home can be simple, fun, and rewarding. With a few key ingredients and creative flair, you’ll be sipping on cool, cafe-worthy coffee all year long.

Join the Conversation!

Have a favorite iced coffee recipe or tip? Share it in the comments below! We’d love to hear how you personalize your drinks. Don’t forget to share this post with fellow coffee lovers!

Share:

Homemade Alfredo Sauce Recipe: Rich, Creamy, and Perfect Every Time

My Love Affair with Alfredo Sauce

When I first tried Alfredo sauce as a teenager, it felt like a warm hug in a bowl. The creamy, buttery texture paired with pasta was nothing short of magical. Over the years, I've perfected my own homemade version, and it's become a go-to comfort dish for family gatherings and cozy nights in.


Introduction: Why You'll Love This Alfredo Sauce Recipe

This classic Alfredo sauce recipe is rich, velvety, and surprisingly simple to make. It's perfect for elevating your pasta dishes, drizzling over vegetables, or using as a base for other creamy creations. Plus, it’s made with just a handful of ingredients you probably already have at home!


Ingredients for Homemade Alfredo Sauce

  • 1/2 cup (1 stick) unsalted butter
  • 1 cup heavy cream
  • 1 1/2 cups freshly grated Parmesan cheese
  • 2 cloves garlic, minced
  • Salt and pepper to taste
  • Optional: Pinch of nutmeg for extra warmth

Substitution Tips: You can use half-and-half instead of heavy cream for a lighter version, and Pecorino Romano cheese for a sharper flavor.


How to Make Alfredo Sauce

  1. In a medium saucepan over medium heat, melt the butter.
  2. Add minced garlic and sauté until fragrant (about 1 minute).
  3. Slowly pour in the heavy cream, whisking continuously to combine.
  4. Bring the mixture to a gentle simmer, then reduce heat to low.
  5. Gradually whisk in the Parmesan cheese until smooth and creamy.
  6. Season with salt, pepper, and a pinch of nutmeg, if desired.
  7. Serve immediately over your favorite pasta or dish.

Cooking Tips and Tricks for Perfect Alfredo Sauce

  • Use freshly grated Parmesan for the smoothest, creamiest texture.
  • Don’t let the sauce boil – keep it at a gentle simmer to prevent separating.
  • If the sauce becomes too thick, add a splash of pasta water or extra cream to thin it out.

Dietary Considerations

This Alfredo sauce is naturally gluten-free, making it perfect for those with gluten sensitivities. For a low-carb or keto-friendly option, serve it over zucchini noodles or spaghetti squash!


Nutritional Information (Per Serving)

  • Calories: 310
  • Fat: 28g
  • Carbohydrates: 3g
  • Protein: 10g

Note: Nutritional values may vary depending on ingredient brands and substitutions.


Serving Suggestions: What to Pair with Alfredo Sauce

Alfredo sauce pairs beautifully with fettuccine pasta, grilled chicken, sautéed shrimp, or steamed broccoli. For a complete Italian-inspired meal, serve it alongside a crisp green salad and a glass of chilled white wine!


Join the Conversation!

Have you tried this Alfredo sauce recipe? I'd love to hear how it turned out! Feel free to leave a comment below, share your favorite add-ins, or ask any questions you might have. Let’s inspire each other in the kitchen!


Share: